Importing Parcels from GIS to a Set
Civic Platform back-office users can use GIS Import to locate parcels on a map and add them to a set.
- From the Launchpad, navigate to .
-
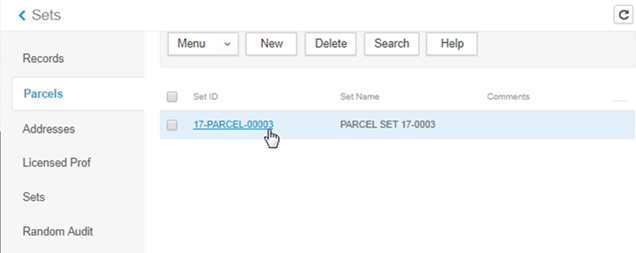
Click the parcel set to add parcels from GIS:
-
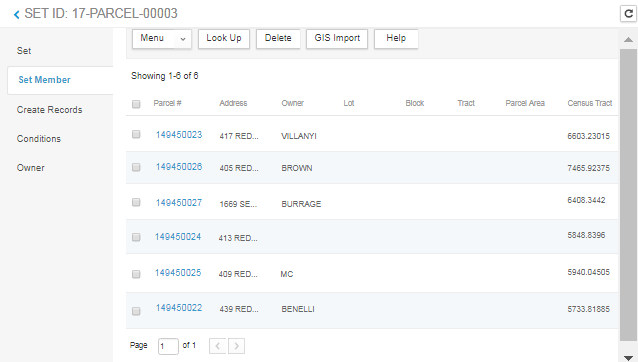
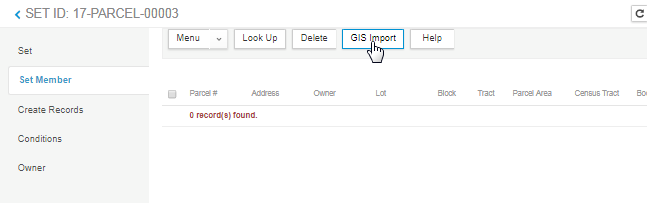
On the parcel set, click Set Member, and click GIS Import:
-
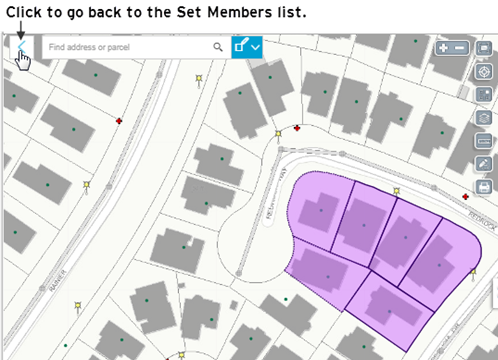
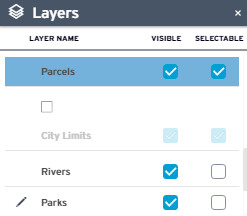
When the map opens, use the zoom, pan, or search bar to locate the parcels to add to the set.Note: Use the Layers widget to make sure the Parcels layer is selectable. If the Parcels layer is disabled, make sure to zoom out to a level where the parcels are visible:
-
Use the selection tool to select the GIS parcels on the map:
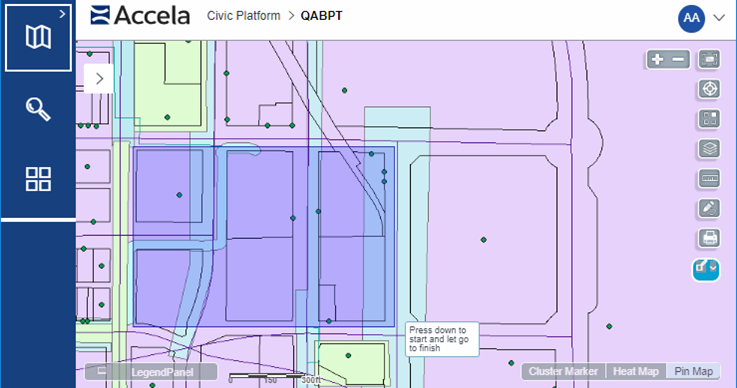
The map Contents panel shows the Records and selected GIS objects.
-
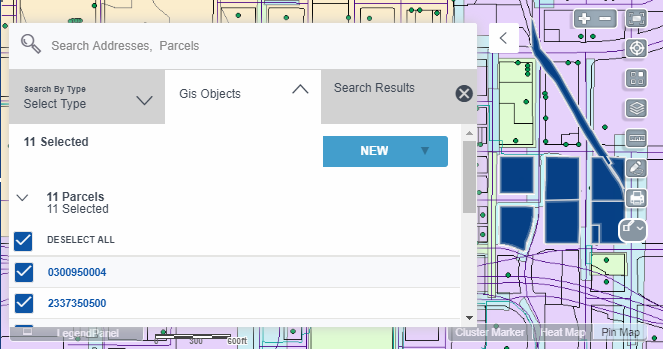
Click the GIS Objects tab to adjust the selection.
-
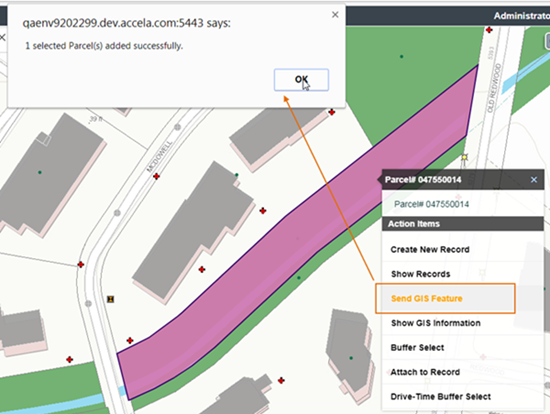
After finishing selection on the GIS Objects tab, select the Send GIS Feature command from the context menu:
Note:- Only active reference parcels can be added to a set. If a parcel GIS parcel is selected and it is not linked to a reference parcel, it cannot be added to the set.
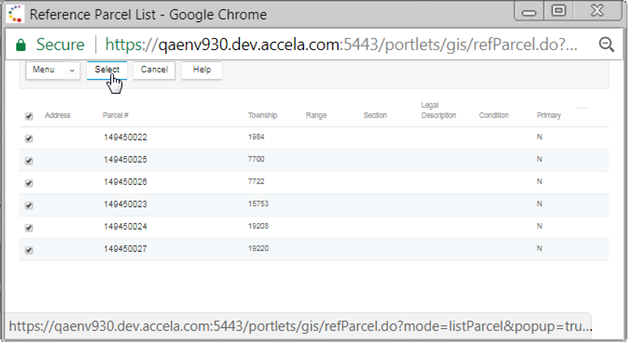
- If multiple GIS parcels are selected, the Reference Parcel List window displays the associated reference parcels. If there is only one GIS parcel selected, this window does not display.
- Additionally,
-
The Send GIS Feature action currently only works with parcel sets.
-
If selecting multiple GIS parcels that have multiple reference parcels, select the parcels to be added to the set from the Reference Parcel List, and click Select:
- Click OK. The map stays open in case of locating and adding more parcels to the set.
After completing selection, click the Back arrow on the map to go back to the Set Members list:
The Set Members list shows the newly added reference parcels: